About:
This project monitors the external humidity sensor connected to Cloudio for 2 days. This data is also displayed on the OLED for the entire duration.
The data for this project is also available in a graphical format in the Dashboard section of GraspIO Studio.
What you’ll need:
• Cloudio - Raspberry Pi setup
• Humidity sensor (You can use any 3-pin humidity sensor of your choice)
Set-up:
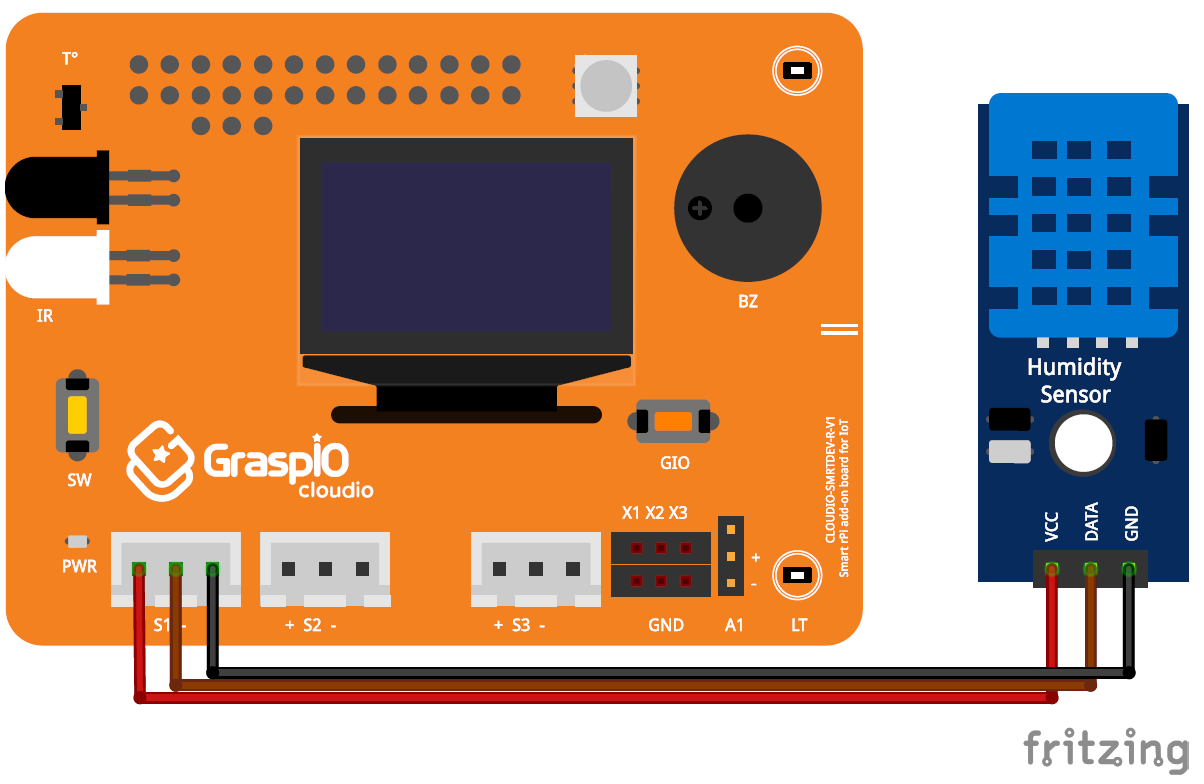
Connect the humidity sensor to Cloudio as shown below.

How-to Video:
Steps:
Step 1: Creating and uploading the project
Set the monitoring duration.
Navigate to the Input category, and drag the Humidity block into the Sensor section of the block.
Note: Action section
Since this project also concurrently displays the real-time values on the OLED for the entire monitoring duration, the Action section is enabled here.
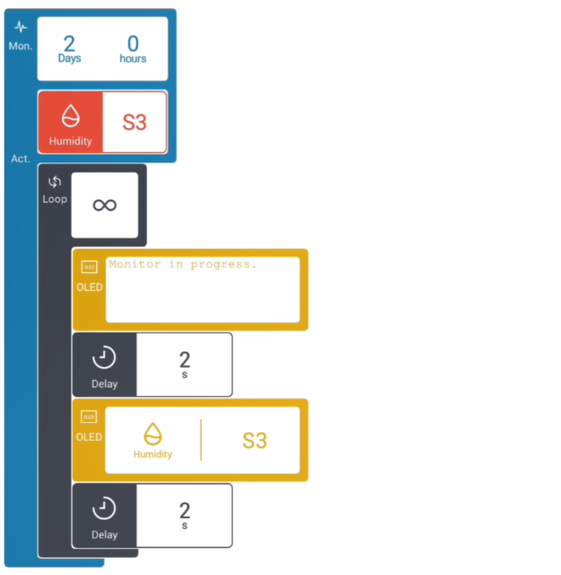
This section contains 2 OLED blocks - one to display a text message indicating that Monitor code is running on Cloudio, and another to display real-time sensor values
Begin by dragging a Loop(∞) block inside the Action section. (Loop infinitely is used because the code corresponding to these blocks are to run for the entire monitoring duration)
Use an OLED block in Text mode to display 'Monitor running',
Then, use a delay block to allow for some time before the sensor value is displayed.
Use a second OLED block in Sensor mode to display the real-time values for the monitoring duration.
The final project is shown below.

Upload the project.
Step 2: Viewing the graphical data
At any point during the monitoring duration, you can view the data collected from the humidity sensor in the Dashboard section of GraspIO Studio. Select the entry corresponding to your board.
This data can be viewed by the complete monitoring duration, or by the day, or by the hour using the panel shown below.

You can choose to export this data using the Share button at the top of the screen.

Notes:
Refer the section on Monitor to learn more about designing projects using this block.