About:
This project helps you build a smart light that turns on or off based on the ambient light levels.
What you’ll need:
• Cloudio - Raspberry Pi setup
• Relay
• Bulb
Set-up:
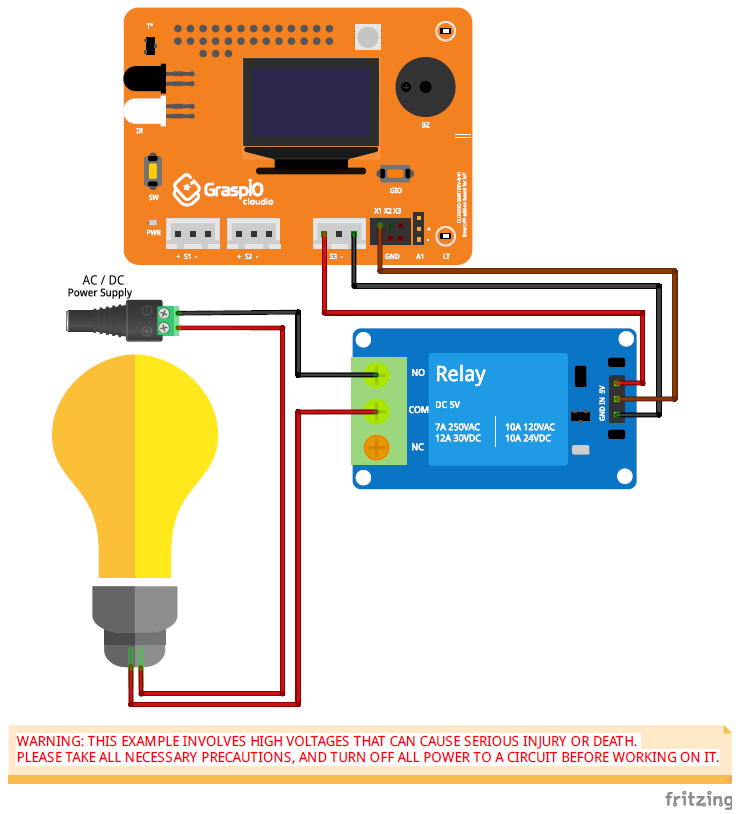
Connect a relay to port X1 of Cloudio. Further, connect a bulb to it as shown.
How-to Video:
Notes:
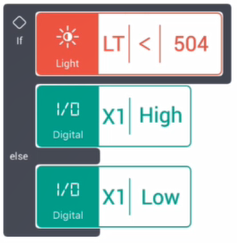
1.If block is used to check the ambient light value.
Digital blocks are used in the True and False sections of the If block to turn the bulb on or off via a relay connected to any of the Digital ports X1/X2/X3.
Steps:
Step 1: Create a snippet that checks the light value at the time of upload and turns the bulb on/off
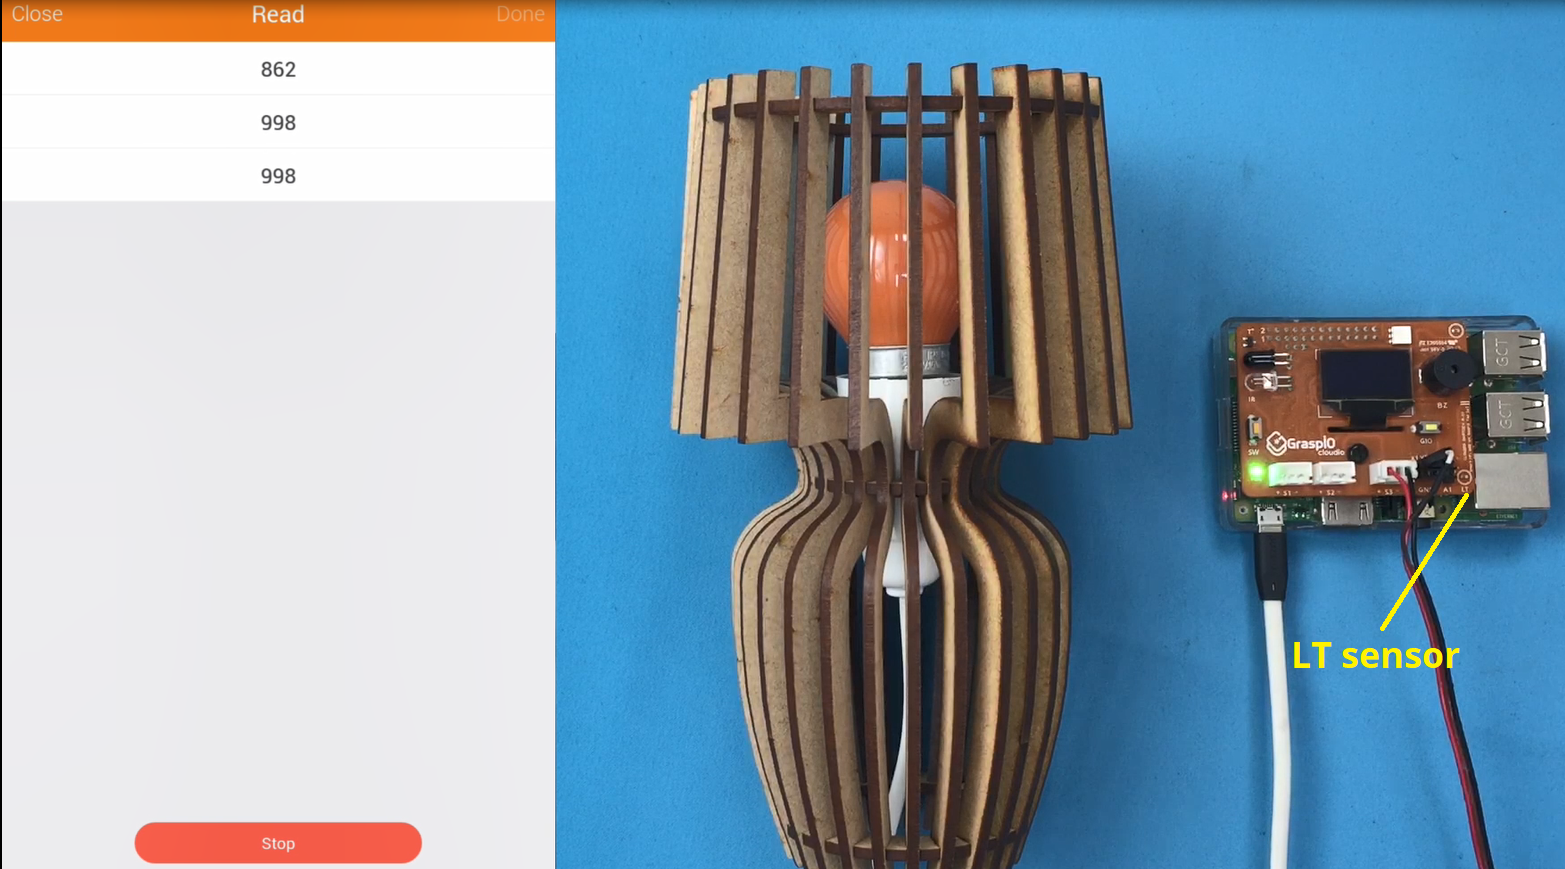
Use Read to set the trigger value; cover and uncover the LT sensor when you do this so you know the exact reading to set the trigger value at.
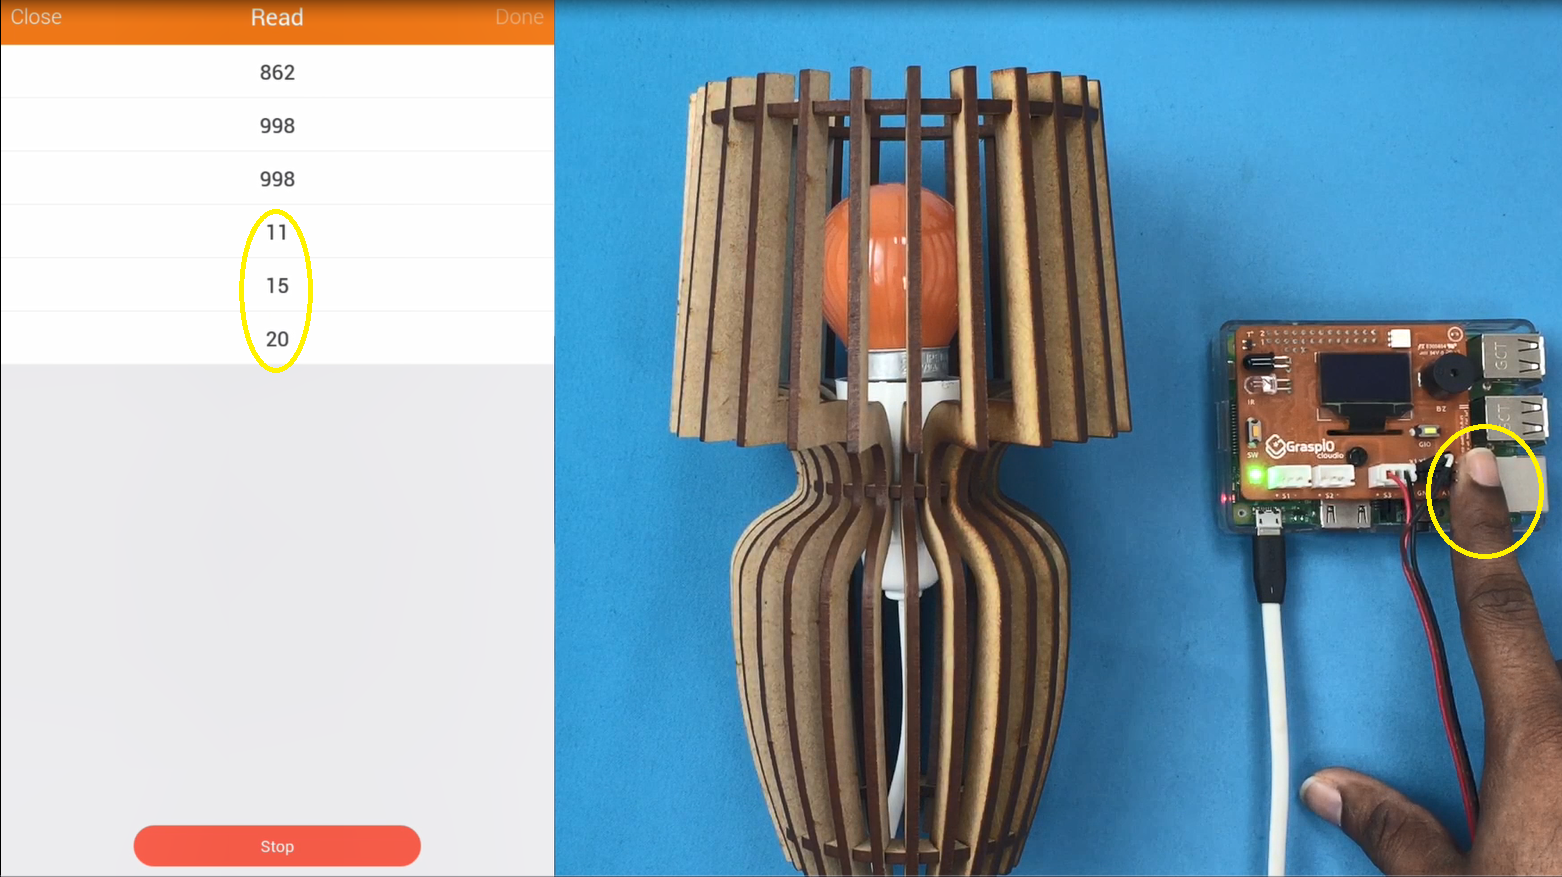
Upload and test this snippet to check if you have set the appropriate trigger value for the ambient light readings.
Note: This test snippet runs ONCE and only AT the time of upload.For this snippet, the bulb should turn on if the Light sensor is covered AT the time of upload.
Step 2: Using a Loop(∞) block to extend the functionality to the entire run-time or on-time of the project
A Loop(∞) is used to ensure that the Light value is checked for the entire duration that the project is running on the board.

The final project is shown below.
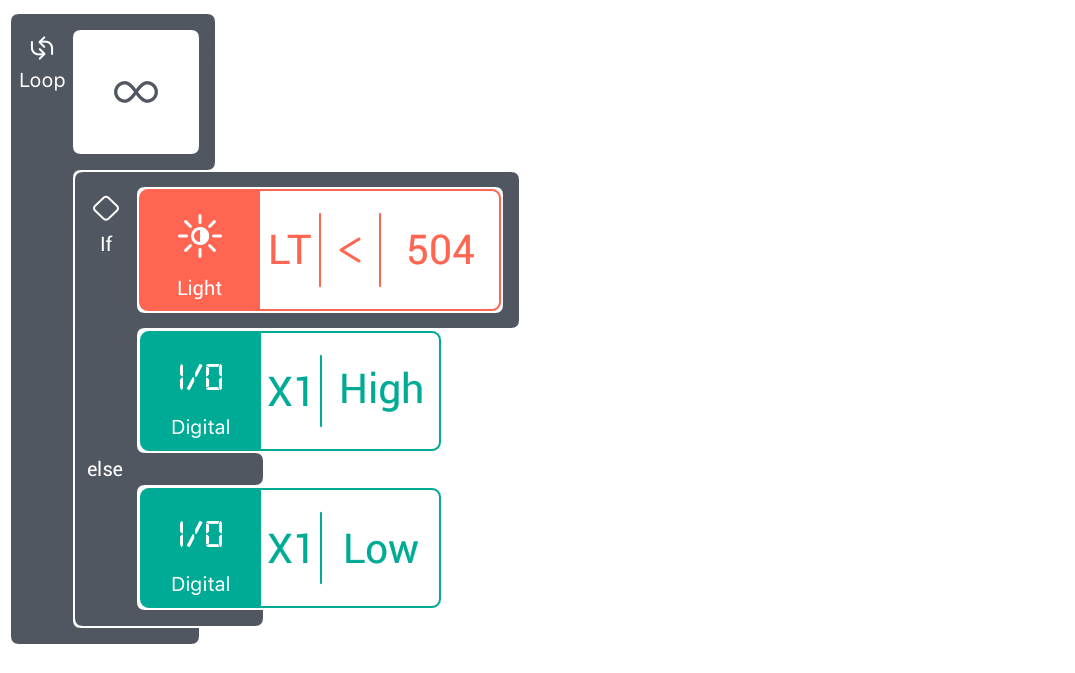
Upload the project.
Step 3 : Running the project
Once the project has been uploaded, vary the light levels to check if the bulb is being turned on when the ambient light level drops.
Note: You can use Read within the Light block's parameter area to set the correct threshold light value/ trigger value.